I am a freelancer in the publishing industry, so words are very important to me. I'm a leftist living in a world gone mad, so politics are very important to me. I'm an environmentalist living in a degrading world, so pick up your damn trash, get rid of your gas guzzlers, and don't touch ANWR, you self-absorbed capitalists!

Do leave comments: let's make this a conversation. If you prefer, you can contact me at friuduric at yahoo dot com.
Showing posts with label Edibility. Show all posts

03 June 2008

Food Challenge, Two Ways

I decided to participate in One Local Summer this year. Silly, huh? The one year I don't have access to a large garden. The one year the only food plant growing in our backyard are two pots of basil and cilantro. But I have faith in our local farmers market. As the season progresses, I'm sure we'll be able to create fantabulous meals of local produce!

And this week? The first week? I've already failed. See, we always buy eggs from our favorite farmer, Geo of Hurricane Flats Farm, at the farmers market. We always have two dozen eggs in our fridge. Except, by the time today (Tuesday!) came along, we only had four eggs left. Sheesh. So the Consort went out and bought me some free range "local" eggs from the food co-op. Since I can't confirm they come from within 100 miles of here, I can't really take credit for it.

I made asparagus and cheese fritatta, with 40% of the eggs from Geo's farm. The asparagus comes from his farm as well (100% of it, of course). The cheese is Ascutney Mountain cheese from Cobb Hill farm (another weekly stall at the farmers market). The salad mix comes from Geo as well. Until local tomatoes are ready, we have our salad without adornments other than homemade vinaigrette. We like it that way. Although it isn't made from local ingredients, the Consort and I had some Long Trail beer (local company, though).

Mmm, tasty tasty!

Doesn't that fritatta look good? Here, have a closer look:

Oooh, fluffy! And in a cast-iron pan!

You'll also notice some bread in our supper picture. Although the flour is from the local (yet nationally famous) King Arthur Flour, the wheat is grown out west. That's OK, because tonight was also the first of two Home Breadmaking Smackdowns.

I've been making sourdough weekly since January, when I got some King Arthur sourdough starter, a pizza stone, and a pizza peel for my birthday. Just last week, though, I took out Artisan Bread in 5 Minutes a Day from the library. This was after requesting it three weeks ago (someone else had it out), and then going to the Amazon site and reading the seven less-than-stellar reviews (out of 123 reviews). Big mistake. By the time I had the book in my hands, those negative reviews had tainted any excitement I may have had about trying this book.

I figured the only way to know if this bread works for us is to compare it with the two other breads we've made recently. Tonight, it was the sourdough.

Five-minute bread on the left, traditional sourdough on the right

Sourdough takes a bit more planning than the 5-minute bread (the starter needs to be fed overnight, the sponge has to do its bubbly thing for 3 hours, then there's 2 hours of rising after the kneading and 2 hours of rising after shaping), but I use my Kitchenaid to knead the dough (sourdough is notoriously sticky dough, a pain to work with by hand), and most of the rest of the time the dough is just "resting," so it isn't a time sink for a home-based freelancer like me.

Do you like airy and "custard-like" crumb, or dense and more bread-like?

After the initial taste, it was 2 to 2. Trixie and the Consort preferred the 5-minute bread ("This tastes much more like European bread!" they said). Impera found it "too wine-y" and I thought that the crumb was too sticky. Also, I thought the crust had a bitter taste, probably from over-cooking (this loaf was 30 minutes in the oven, vs. 20 minutes for the sourdough -- but I think if I had taken it out sooner than called for in the recipe, the center wouldn't have cooked through).

By the end of the meal, Trixie had joined Impera and I on the Pro Sourdough side, and the Consort (stubbornly) remained with the 5-minute bread.

Soon, I'll make another of these loaves (the recipe makes enough batter for 4 loaves, and the dough can stay in the fridge for 14 days) and compare it to one of those no-knead loaves that have become so popular in the past year or so. I'll keep you informed!

15 April 2008

When You Hanker for a Bowl of Brown

Sometimes, I get a hankering for brown food. You know, broth, soy sauce, sauteed mushrooms, soba noodles, tofu (OK, that's more golden, but work with me here). Add it all together, and you've got yourself a tasty (and healthy!) brown meal.

1/4 cup oil
1 lb tofu, 1-inch cubes, patted dry
8 oz sliced mushrooms
grated ginger (1.5 tsp? 1 Tbsp?, whatever you like)

1 head broccoli, florets only,* cut into bite-sized portions
8 oz (or 1 lb, if you're me and like to cook for an army) soba noodles (buckwheat noodles)

4-8 cups broth (depends on how much noodlage you have)
1/4 c. soy sauce

Heat the oil. Saute the tofu, in two batches. When golden, remove from pan and drain on paper towels. Saute the mushrooms until they release their juices; remove from pan and set aside. Add the ginger (you may need a dash more oil at this point), saute for a minute, then return the tofu to the pan and stir up. Set aside.

Meanwhile, heat a pot of water to boil, add the soba noodles, and cook according to package directions. In a stockpot, heat the broth to boiling. Add the broccoli, turn off the heat and let sit until the noodles are done. Drain the noodles and rinse under cold water.**

Plop the noodles into the broth, add the soy sauce, tofu/ginger, and mushrooms. Taste and adjust seasoning, if necessary.


Enjoy your bowl of brown!***


If you have leftovers, let me share this genius (genius, I tell you!****) method the Consort recently came up with: Strain the noodles and vegetables from the broth and store them in the fridge in separate containers. No more soggy noodles!


*Yes, you can use the whole thing. I use the stalks in something else. i like the aesthetic of florets only in my bowl of brown.

**Why not cook the noodles and the broccoli together, in the pot of broth? Good question. But the package directions frightened me. They always insist on a rinsing of the noodles under cold water. I don't know what would happen if I didn't rinse the noodles before eating them. i don't dare test it out.

***In George RR Martin's Songs of Ice and Fire series, a "bowl of brown" is what one finds to eat in the streets of Flea Bottom, the dangerous and poor district of King's Landing. My bowl of brown is much better. Believe me.

****Don't tell me if everyone already knew about this method. It's new to us, and that's all that matters.

09 April 2008

How About a Slice of This with Your Coffee?


Hazelnut brown butter cake with chocolate ganache

This is a cop-out post, because I put this up on flickr the other day, but my inspiration has hit a dry spell.

Anyway, if you haven't already read what I said about this recipe, you can find out here. (Also, when the owner of a food blog with almost 1,500 subscribers leaves a little comment on your photo, you kinda want to show it off. )

07 April 2008

How to ... Cold-Brew Coffee

So, yes, I drink coffee from time to time. I don't use it to wake up; I make my coffee pretty weak, as you'll see. I usually have it halfway through the morning, after I've had a pot or two of tea (black or green). Just to "mix it up" a little in the drinks-during-work department. Also, I drink my coffee like a baby: with sugar and milk. Since I drink my tea "straight up", my coffee is a sweet mid-morning treat.

We always have coffee filters in the house, but I've tried to reduce the number of them that I use. It just seems like such a waste of paper. Sure, I could buy a french press pot, but again, I like the coffee weak, and, why should I spend money when I can make my coffee concentrate for free? Another perk? Cold-brewed coffee is lower in acidity than heat-brewed coffee. No more sour stomach!

There are many places online to find cold-brew directions. Here's my take on the process. (Note that I make this in small batches -- partly because I'm mostly the only one to drink coffee, and partly because our fridge is often filled with other large containers. You can increase your batch size according to your useage/spaceage.)

First, grab some coffee. Organic fair trade is best, of course! (Let me pre-empt any reactions by saying: This coffee grinder was actually bought as a gift for the Consort, who wanted a spice mill. I've appropriated it, but we didn't buy it for coffee. That use only came later.)


Put 4 tablespoons of ground coffee in a clean jar. My jar size is 2 cups. (That's the general ratio: 8 cups water for 1 cup of ground coffee.)


Add a bit of water and make sure the grounds get good and wet. Coffee grounds are rather powdery, so if you forget to do this step, the grounds will float to the top and it'll be a pain to mix them in. Trust me. I speak from experience here.


Now you can fill the jar with water.


Screw the lid on, and then place the jar in a cabinet, away from sunlight. I think the real directions say to let it cold-brew for 12 hours, but I find that I always forget 12 hours usually comes when I'm ready for bed, and I'm too tired to do anything kitchen-related it tastes richer after 24 hours. So I let it sit 24 hours (because by then it is the next morning and, hey! I feel like having a cup of coffee! -- so I remember that the jar is sitting in the cabinet).


When you take the jar out, you'll notice that all the grounds are up at the top.


The original calls for you to strain the liquid with a fine-mesh sieve. I don't have a fine-mesh sieve. (But I do have two sieves! two sieves layered = one fine-mesh sieve, right?). I also like to use my canning funnel to prevent spillage. You don't need this. Probably most people don't need this; I'm just messy when it comes to pouring liquid from one jar to another. A long-handled spoon also comes in handy (as we shall shortly see...).


It's helpful to break up the grounds with a spoon before you pour it out. This prevents the grounds from coming out in a big clump and making a mess on the counter (and from having some rather rich words fill the air [yep, experience talking again]). When you break up the grounds, you'll notice some bubbling; this is normal, no need to freak out or worry about fermentation.


OK. Go ahead and strain it. You can let it sit a few minutes to get all the liquid out. I find that giving it lots of time does not produce much extra concentrate. Maybe I'm just impatient. Probably I'm just impatient. Yep. I'm impatient.


The result will look suspiciously like coffee. But stronger. You can now place the jar in the fridge to store it until you want to make a cup of coffee.


Boil some water in your kettle, take the concentrate out of the fridge, and pour your preferred amount into the bottom of your cup. The beauty of using cold-brew concentrate is that each person can make their cup as strong or as weak as they like. For example, I think a normal person would use 1/4 cup concentrate for a regular-sized coffee mug. Me, I use 1/4 cup when I use Impera's mega scrabble mug. But that's what I like: a nice steaming cup of dishwater.


Go ahead. Try it. Make yourself a cup of non-acidic, non-paper-wasting, non-electricity-using, sweet, cold-brew coffee. Mmmmmm.

You'll smile, too.

(Darn, that last picture isn't as clear as I thought it would be. That's a mug of coffee in the foreground. See? I'm offering it to you.)

04 April 2008

Orange-Yogurt Muffins


3 large oranges
1/2 cup sugar
2 tablespoons water
5 tablespoons unsalted butter
2 cups flour
1.25 tsp baking powder
1 tsp baking soda
1/2 tsp salt
2 eggs
3/4 cup plain yogurt
3/4 cup milk

Preheat oven to 375 (190 C). Butter your muffin tins.

Grate the zest of the oranges (you can use a vegetable peeler, then chop fine). You should have about 1/4 cup zest. Combine the zest, 1/4 cup sugar, and water in a small saucepan. Heat over medium heat and boil 2 minutes, stirring. Add the butter and stir until melted (about 1 min. more). Put aside.

Toss together the dry ingredients (don’t forget the other 1/4 cup sugar!). In a separate bowl, whisk together the wet ingredients with the orange mixture until smooth. Stir in the dry ingredients, until just blended.

Spoon into the muffin tins, about 3/4 full. The batter will make about 13 muffins. That’s an awkward number, so distribute as you see fit. Bake until a knife inserted in the center of a muffin comes out clean, about 15-20 minutes.

Cool in the tins for 3 minutes, then remove.

Orange glaze: combine 1/2 cup powdered sugar, a pinch of salt, and 2 tablespoons orange juice. Brush the still-warm muffins with this glaze.

30 March 2008

How to ... Make Maple Snow Candy

On Friday, the girls had a snow day. The Consort was down in Boston for a conference. I was zoning out on the couch, letting my body fight the cold as best it could. One of the many joys of having older kids is that when you're not feeling well and they are home from school, you don't have to entertain them. Yahoo!

Late morning, and the snow was still coming down. "Hey, Mom, can we make maple snow candy?"

Trixie had recently read A Gathering of Days, and of course we had all read at some point in the past Little House in the Big Woods; both of which describe making snow candy. In fact, ever since I was a little girl and read Martine in Quebec (I couldn't find it online, but I swear there was an episode where she visited Quebec during Winter Carnival!), I had wanted to make snow candy.

Here we were in New England, during what might very well be the last snowstorm of the season, of the one year we were spending in NE. Of course we should make snow candy! They also thought it would be great to make a "How to" of this.

Another joy of having older children is that they can do so many things on their own. I now present the joint production of, How to Make Maple Snow Candy.

1. First, gather your materials: A saucepan, some local maple syrup, and a candy thermometer (optional, but handy).


2. Then, collect some snow. Originally, the girls put a jelly roll pan (raised edge cookie sheet) out in the snowfall. When Trixie came in and told me the snow was melting on the sheet, I said, "Oh, just put it (the snow-filled cookie sheet) in the freezer (until we're ready to make the candy)." I was unclear, so she thought I meant put just the cookie sheet in the freezer, not the snow and cookie sheet. In the end, the girls went outside and collected snow from an unwalked-on patch.


3. Pour some syrup in the pan, turn heat to medium, and let it boil, boil, boil. You can let it get to soft ball (240 degrees) or hard ball (260 degrees) stage. We went somewhere in between.


4. When the syrup is at the right temperature, get the bowls of snow on a flat surface near the stove.


5. Drizzle the hot syrup over the snow.


6. It hardens on contact with the snow. Dig in and eat. If the syrup was boiled to soft ball stage, it will be stretchy like caramel. If the syrup was boiled to hard ball stage, it won't stretch as much, but will be sticky in your teeth. Either way, it is tasty.


It really is so simple. The girls think we should keep this in mind for a winter potluck with our Iowa friends. I think that's a great idea.

I also like how bubbles were caught in the solidifying candy.

Enjoy!

24 March 2008

Getting Out of a Rut

We all do it: Get used to something and stop trying alternatives. For example, biscuits. There's the recipe you've been using since you started making biscuits. It's the recipe you showed your kids when they started cooking on their own. It works well (it's the Betty Crocker buttermilk and shortening recipe, after all -- a classic!). Why would you ever look at another recipe?

Until the lazy day you don't feel like walking over to the cookbook shelf and grabbing the Betty Crocker (so lazy). You flip to the index of the cookbook you're using for a soup recipe. And, look, it's got a biscuit recipe, too. Might as well give it a try.

Hmmm. This one is made with whole milk (no prob, just mix a little cream in the skim milk) and butter (no shortening? They'll be hard as a rock!). But the author gives you two tips.

One is, after you place the prepared biscuits on the cookie sheet, stick them in the freezer for 15 minutes or the refrigerator for 30 minutes, then put them in the oven. The secret to flaky biscuits, she says, is cold dough. (Well, that, and handling them as little as possible during the process, as you already know from Betty Crocker.)

The second is to place the biscuit cookie sheet on a second, empty one when you place the biscuits in the oven. That's the secret to preventing dark bottoms on your biscuits.

How did they turn out? Fantastic.

Look at me -- Old dog, new tricks!

18 March 2008

What I Made Yesterday

My Irish Soda Bread recipe.


Preheat oven to 350 F. Grease a 1.5 quart round baking dish.

Combine:
2 c. unbleached white flour
1/2 c. whole wheat flour
1/2 c. wheat germ
1/2 c. sugar
3/4 tsp. salt
2 tsp. baking soda

Rub in:
4 Tbsp. butter, cut into bits

Stir in:
1 c. raisins
2 Tbsp. caraway seeds

Add:
1-1.25 c. buttermilk or yogurt

Mix until combined. Turn out onto counter and knead for 1 minute (the dough is a bit sticky). Plop into prepared baking dish. Cut an X on the top. Brush the top with milk.

Bake for 55-60 minutes. Remove from baking dish and let cool completely on wire rack. (If you let it do the last bit of cooling in a plastic bag, the crust will be softer and easier to slice.)

12 March 2008

Update on Those Donuts

Here is Three of Four’s report on the donut experiment:

I got up early Sunday to get the dough going, so that it had time to rise before the whole house got going and started grumbling about food. [Ed. note: Of course, the original recipe gives suggestions for how to prepare these the night before, but clearly only oldest sisters read a recipe all the way through!] I was careful to invoke my inner donut-maker, chanting "Time to make the donuts" repeatedly on my way to the kitchen. I stopped short of wearing the funny paper hat, though.

The dough was easy to make and I didn't need to make any adjustments to the recipe. Halfway through the rise, we ended up transporting the whole operation to [Split Sister]’s house. (This was a stroke of genius on [my darling spouse]’s part: if he was going to be our recipe guinea pig, he wasn't going to go down alone!)

At [Split Sister]’s place, we rolled, cut and prepped the donuts for baking. We had to scale back the second rising period a little bit (or we would not have had time to eat the donuts before we had to head out for an afternoon hockey game), but this didn't seem to have too much of an adverse affect on the end product. We made two trays of donuts and one tray of donut holes.

They baked perfectly according to the recipe -- 8-9 minutes to achieve a golden bottom (5 minutes for the donut holes). The recipe author is correct, they are really best when still piping hot! Yum! The kids loved them.

The donuts were denser than I'd anticipated. I expected something like a light cake; these were more like sweet bagels in texture. The downside is that about five minutes after one donut, there is a very heavy, full feeling that spreads through your stomach. I will definitely be making them again, but probably only munchkin/donut holes. It's easier to control intake that way. The upside to their heaviness is that we made it through an entire hockey game without one person whining that they were hungry. Given the cost of concession foods, that probably saved us at least $20.

[Split Sister] took pictures & should be sharing them later today. [Ed. Note: Never received any photos. I got bored of waiting and decided to post this anyway.]


Thank you to the Washington, DC, contingent for being the guinea pigs on this experiment. Now I won't have the urge to make these; I can live vicariously through your experience. With all that brain room free, I can obsess over this, instead!

05 March 2008

Why Oh Why?

Do I always come across links like this? And I wasn't even searching for this kind of thing. I was passing through one of my daily reads (which isn't one of my food reads).

Darn.

I'm going to try to resist it. I am!
I would like to share something better with all of you:


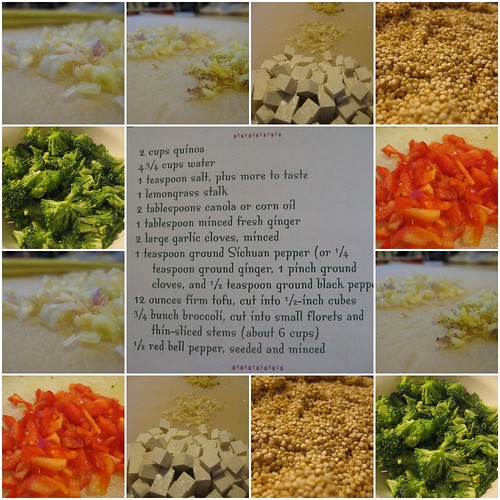
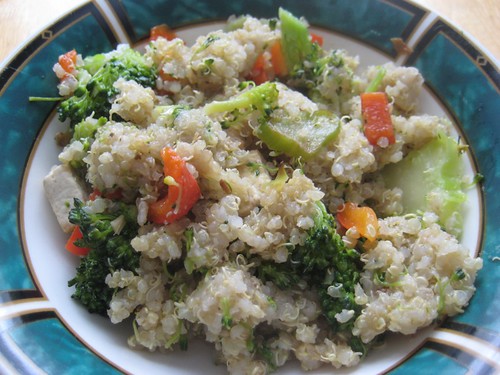
Lemongrass Quinoa Pilaf. Follow the link for the directions.

05 February 2008

I'll Trade a Recipe for Some Sympathy!

Yesterday was quite the day.

I know the one who really deserves sympathy is the Consort, who spent from 6 a.m. to 3 a.m. awake and in airports waiting for flights that were delayed, and delayed, then delayed some more; boarding planes when the weather cleared; deboarding those same planes when the word came in that their destination airport (Chicago) was closed due to weather; reboarding planes and waiting in line to get de-iced; knowing you won't make your 6:40 p.m. connection because the flight that was supposed to arrive at 2:30 p.m. was now landing at 7 p.m.; being pleasantly surprised that the 6:40 p.m. flight was also delayed, so you actually could make your flight; but with the downside that having that last flight delayed meant that instead of arriving in Manchester at 9:51 p.m., you actually arrived at 12:20 a.m.; and having a 1.5-hour ride back from the airport (which ended up taking over 2 hours because of the blinding snow that was falling).

So, yeah -- big hugs and sympathy to the Consort. Blah, blah, blah.

But, people, I was the one who stayed up until 3 a.m. alongside him. I drove both directions on snowy highways through the mountains of New England, in the middle of the night when typically quiet highways are completely abandoned, deciding to keep my cell phone in my pants pocket rather than on the empty passenger seat beside me because, if I crashed, I wanted to be able to reach the phone to call for help rather than have it tossed somewhere inaccessible as I was pinned in the upside-down crashed car (didn't happen, but you have to be prepared!), with the snow making visibility pretty bad (yes, the Consort had told me he could sleep in the airport and I could pick him up in the morning, but the snow and the roads didn't seem bad until I was about 30 minutes into a 90-minute drive, and by then I figured it was better to soldier on). (And really, the Consort said the conditions were fine. Until maybe the last 20 miles. And I sure wished he hadn't told me that while I was driving those last 20 miles).

So: poor, stressed, tired Imperatrix.

Oh, and the 1-2 inches of sleet they predicted for accumulation over night? We didn't get it. Instead we got 5 inches of snow. And the girls got the 45th snow day of the season. Sheesh! I told they they won't be dancing around in such joy when it is July 29th and they are still in school. (They ignored me. They prefer to live in the moment, those bohemians.)

One perk of snow days is that Impera then offers to make something for breakfast (she's not a big cereal fan). It probably would have been eggs ... except that I made eggs for supper last night (seeing as I first had to run them to fencing practice, then drive down to pick up the Consort, and we often take advantage of the Consort's absence to have breakfast for supper [since he isn't a big fan]).

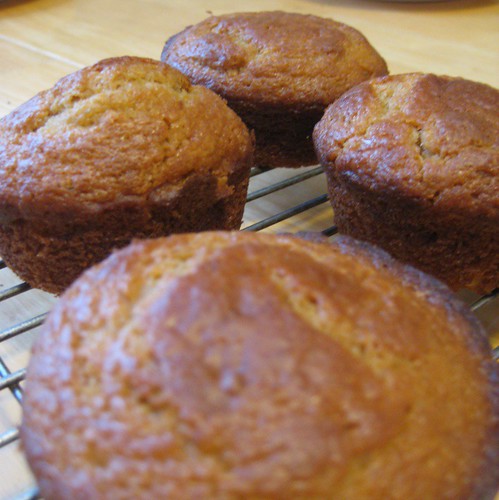
She found a recipe for Maple-Sour Cream muffins. We had no sour cream, but I had just made up a batch of yogurt, so we made Maple-Yogurt muffins with pecans. These things are delicious! They taste like portable pancakes -YUM! They don't rise very high, but that's OK. Really. Go make up a batch. Eat them all.


Maple-Yogurt Muffins

1+3/4 cups flour (I don't know how to make stacked fractions in html)
2 tsp. baking powder
1 tsp. baking soda
1/2 tsp. salt
1/2 cup unsalted butter, at room temperature
3/4 cup maple syrup
1 cup yogurt
1 egg
1/2 cup chopped pecans

1) Preheat oven to 400 degrees. Grease muffin tins.

2) Combine the dry ingredients in a small bowl.

3) Beat the butter until smooth, then slowly add maple syrup, beating constantly. Beat in the yogurt and the egg.

4) Stir in the pecans.

5) Add the dry ingredients and stir until just blended.

6) Fill muffin tins 2/3 full. Bake until toothpick in center comes out clean, 15-18 minutes. Cool in tins 5 minutes, then remove.

Makes 16 standard muffins.

01 February 2008

S-U-C-C-E-S-S

That's the way you spell sourdough!

Picture I promised to post for Cowgirl.

I know, I know -- I just posted about my Christmas loot, but you see, for my birthday, my mother-in-law gave me a card with a generous gift (aka, the notorious "cold, hard, cash"). I've been intrigued by sourdough bread for a while, which is why I got the brotform with Christmas money.

But when I read recipes for sourdough in my King Arthur Flour Baking book, they all called for a baking stone (which works better when paired with a pizza peel) as well. I used my birthday money for that equipment, as well as some sourdough starter from King Arthur (I had started to make some starter myself, but our house is much colder than the 70 degrees [59 during the day and 55 at night] they use as "room temperature", so I wasn't sure the wild yeast was growing right).

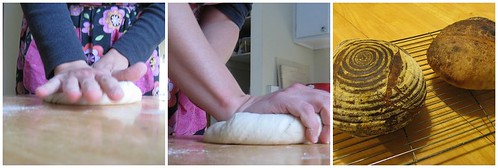
For two days I fed and rested the starter (in a small cooler, with two jars of hot water and the starter wrapped in a towel to keep the heat up to 70 degrees), and yesterday I used some for my first sourdough. As you can see, they came out beautifully. Both loaves (the one proofed in the brotform, and the second one proofed on a cookie sheet) were pretty small when I popped them in the oven, but the initial steam douse (1/2 cup boiling water poured into a preheated cast-iron pan under the baking stone), helped some, and the second steam douse 5 minutes after they started baking (I didn't have a spritzer, so I just took 1/2 cup hot water and threw it onto the side walls of the oven -- it worked!) made those loaves rise up nice and high (I had no idea how successful steam would be. I am now a steam convert!)

Now fresh starter is sitting in my fridge. To keep starter working well, you need to use it and refresh it at least once a week. Sourdough only takes some starter, flour, salt, and water (i.e., it's extremely cheap to make once you have the equipment), so I figure I'll be baking some every week. I don't think we can eat sourdough every week, but I've got lots of neighbors I can share with. Goodwill is always important, especially as we move towards Spring when our bird-loving neighbors are going to stress about Loki's presence all over again!

20 December 2007

Good Fruitcake

A few years ago, I found a New York Times article on fruitcake. The only thing I knew of fruitcake was that old story of a fruitcake that had made the rounds since 1954, never tasted but passed on from year to year to some new unsuspecting victim. The article made fruitcake seem edible, so I followed the recipe. The result was good. So good that I've made the fruitcake every year since then. It's one of the Consort's favorite Christmas-time snacks, and he was whistling and bouncing around last night the entire time we were making it (the dates I requested on the shopping list hadn't gotten purchased, so when I mentioned that I'd just postpone making the fruitcake to the next night, he grabbed his keys and went out to buy the dates. A car trip for a single item -- doesn't happen too often around here). I present to you now: Good Fruitcake.

Time: About 2 hours plus 30 minutes' chilling

Butter for pans
1 pound pitted Medjool dates (I have never gotten anything but "dates"; I know not of this Medjool)
1/2 pound prunes from Agen or use more dates (from Agen? Pshaw. I get mine from Sunsweet)
1 pound candied pineapple
1 pound candied cherries
1 cup chopped candied orange peel, or 1/4 cup freshly grated orange zest
2 cups sifted all-purpose flour
2 teaspoons double acting baking powder
1/2 teaspoon salt (they said kosher salt in the original, but kosher won't sift, as they want it to, so again, I use the pedestrian version available to pedestrian me)
4 eggs
1 cup granulated sugar
2 teaspoons almond extract
2 cups shelled salted pistachios
1 cup shelled almonds
2 1/2 cups shelled pecans
2 cups shelled walnuts
White corn syrup
1/3 cup Armagnac, bourbon or whiskey


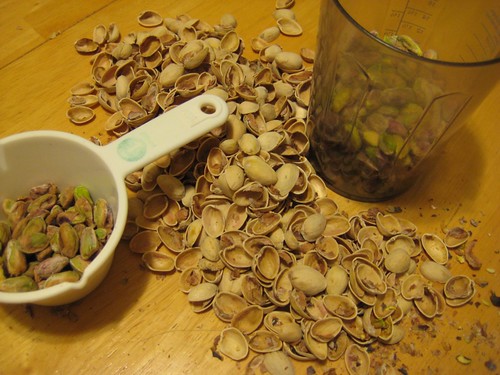
The most bothersome part will be shelling the pistachios. Two cups! But definitely worth it.


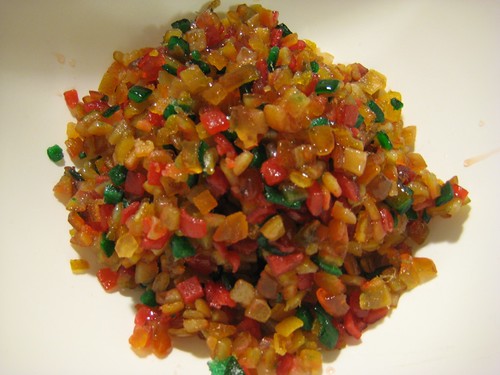
I usually buy the candied pineapple, cherries, and orange, just as the recipe calls for. This year, being in the boondocks, the Consort could only find the green and red colored pre-cut mix. I shuddered, then plowed ahead. I definitely recommend getting the individual whole fruits if you can. Better texture, better flavor, and none of that crazy irradiated-colored fruit.


1. Butter two 9-inch springform pans. Line with parchment paper, and butter again. Heat oven to 275 degrees.

2. Coarsely chop dates, prunes and pineapple. Combine fruit in a bowl with cherries and orange peel. Sift together the flour, baking powder and salt. Sift this over fruit [Too much sifting. I plop it all together, then sift, once, as I sprinkle it over the fruit]. With your hands, toss to coat.


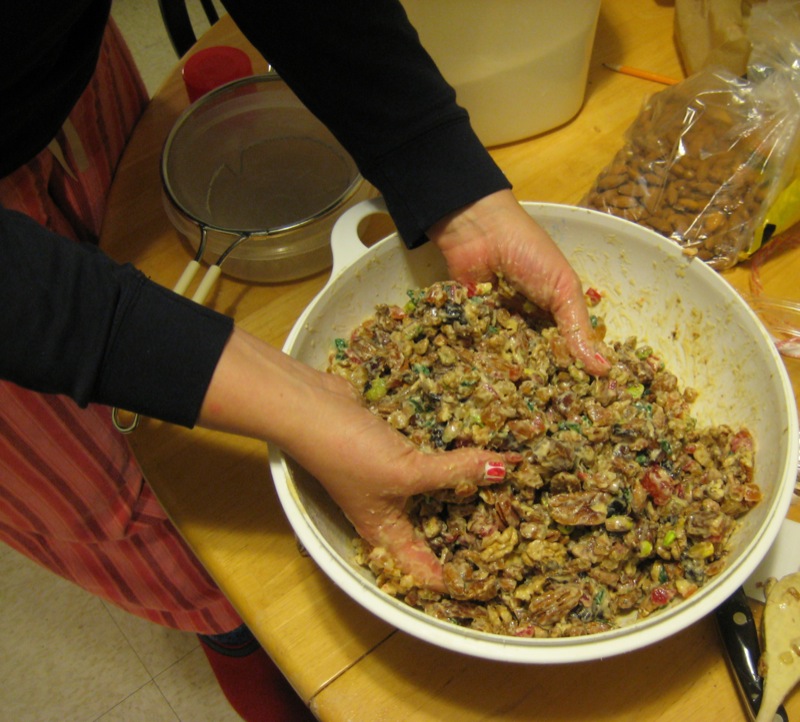
3. In medium bowl, beat eggs until frothy. Beat in sugar, then almond extract. Pour over fruit. With wooden spoon, mix well. Fold in pistachios, almonds, pecans and walnuts, and mix until coated with batter.


The only way to get everything well mixed is to go in there with your hands. Please ignore the terrible home manicure (supposed to be candy-cane stripes) and the pajama pants. Pretend I'm doing this in a neat TV show kitchen.


4. Divide mixture between pans. Using your hands, pack batter firmly and fill in open spaces [I cover my hands with a thin layer of vegetable oil to press the filling into the pans. Otherwise nuts and fruit stick to your palms and create a bit of frustration]. Bake for about 1.5 hours, until tops of cakes look dry but not brown. When cakes are done, transfer to cooling racks. Let stand for 5
minutes, then release springform and peel off parchment paper on sides.

5. While cakes are still hot, brush lightly with corn syrup. Let cool 30 minutes, then spoon Armagnac on top. When completely cool, remove cakes from pan base and peel off parchment paper on bottom. If not eating right away, wrap fruitcakes in plastic wrap. They will keep for two months in refrigerator. If storing, sprinkle with more Armagnac an hour before serving.

Yield: 2 fruitcakes.

I do usually make this in two springform pans, but I didn't bring them this year. I made it instead in a cake pan and two loaf pans. It worked just fine and they were easy to unmold (but I do prefer my springforms).

18 December 2007

Peppermint Mocha

If you think you deserve a treat for dealing with cranky post office workers, if you thought everything was organized and you suddenly realize nope, actually, you are way far behind, then make yourself one of these, and forget your troubles for a minute or two (it isn't a *real* mocha, after all).

1 mug coffee
2 Tablespoons hot cocoa mix
peppermint oil


Mix the hot cocoa powder into the coffee. Take a 1/4-teaspoon and drop a bit of peppermint oil into it. Drop the oil back into its jar. Now your 1/4 tsp is coated in oil. Stir that coated spoon into your chocolatey coffee goodness.

Drink it up.

28 November 2007

City Swap Goodies


City swap goodies
Originally uploaded by friuduric.

I participated in a bloggers' City Swap this month, and last night I received my package. What a treat! It seems that the home of my swapper, Kate, is also the home of a very cool organic farm, Mt. Olive Organic Farm. From the brochure she included, it looks like I'd be in heaven if we lived nearby: olives, sprouts, vegetables, teas, fruits, nuts, free-range chickens and eggs, and what looks like the largest worm bin in the world!

Her package included several items from the farm: mint tea (perfect for an evening cuppa), olive oil with balsamic vinegar and roasted garlic (I'll be making some bread we can dip in this, just like at the girls' favorite restaurant), and plum jam. I got up early this morning to make some biscuits, to celebrate this tasty package. Thank you Kate! And thanks to Shelley of At Home In Rome for organizing this great exchange!

27 November 2007

Lentil Nut Loaf

Marsha mentioned that she cooks tofurkey because her family requires a turkey-ish thing on the Thanksgiving table. Here's what the Consort makes every year for Thanksgiving. I explain the Thanksgiving version after the regular loaf-pan directions.

Nut and Lentil Loaf

4 cups water
2 cups lentils (if you have red lentils, then do 2/3 cup red lentils and 1 1/3 cup brown lentils. It will stick together better that way. Otherwise, just use brown lentils and it will be fine).

Cook the lentils on the stove until the lentils are soft, about half an hour.

In a large saucepan, melt:
4 tablespoons butter
Add and cook over low heat for 15 mins:
12 stalks celery, finely minced
2 Tablespoons mixture of tarragon, thyme, sage, oregano, rosemary, and other herbs that you like
4 cloves of garlic, finely minced
4 teaspoons salt (seems like a lot, but we have been doing this for a wile, so trust me!)

Combine lentils and celery mixture and add:
4 cups finely minced onion
4 eggs, beaten
1 cup old-fashioned rolled oats
1 cup walnuts, coarsely chopped
1 cup almonds, coarsely chopped

Turn into 2 well-buttered standard loaf pans. Bake in a 375 degrees oven for at least 1 hour, until a knife comes out fairly clean.
.
While the loaves are baking, make the sauce. in a saucepan, melt:
4 tablespoons butter

add and cook very slowly for 30 mins.:
2 cups minced onion
2 vegetable bouillon cubes, crushed

Add 2 cups water, bring to a boil

Then, add and cook until thickened, stirring constantly:
2 Tablespoons cornstarch, dissolved in a little water
1 Tablespoon all-purpose flour, dissolved in a little water

When thickened, add:
2 Tablespoons tomato ketchup

Serve some of the sauce over each portion of the loaf

For a real thanksgiving display, make the loaf in a large, oval baking dish, as well as filling a few muffin cups with loaf.

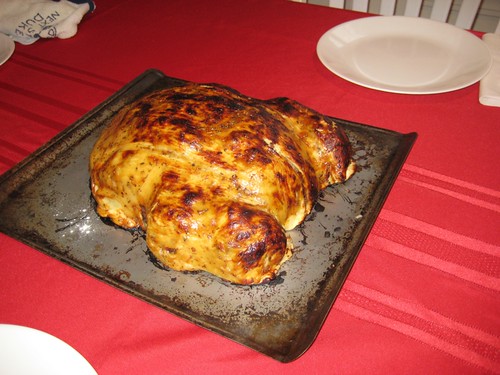
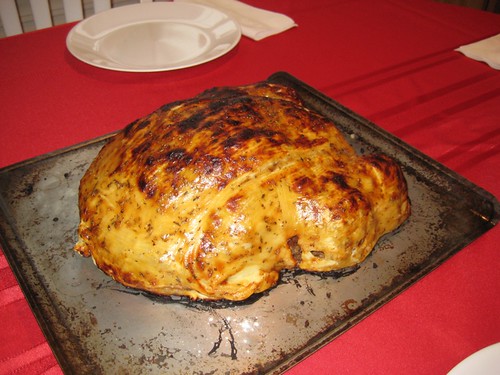
When done, put the oval nut loaf on a baking sheet, using the muffin-loaves to make the thighs on each side. Roll out some puff pastry for the "skin", and cover the loaf. Brush this with a mixture of soy sauce and ketchup for color, and bake at whatever temperature the puff pastry box says. Make a twist in the other end for the neck, maybe cut a slit between the legs and sew it up like you would a turkey, and so on. Chopsticks can make nice drumsticks. It all depends upon how creative you're feeling!

Front of nut loaf turkey

He usually does the stringing and chopsticking, but we didn't bring our chopsticks with us, and we had no toothpicks in the house to make the closed up turkey cavity this year. You can see the pictures larger on flickr.

Back of nut loaf turkey

NOTE-If you make it in the regular loaf pans, then it can be cut into portions when cold, wrapped in foil or plastic, put in a plastic bag, and frozen for future use. You need only defrost the number of slices you need (when defrosted, this is delicious microwaved as a sandwich, with ketchup and maybe some cheese).

26 November 2007

I had one of those weekends where you want to do nothing (and therefore do nothing), but at the end of it you feel sort of let down.

Well, I didn't do absolutely nothing. I did lots of Web surfing. And I learned that there are some blogs that I shouldn't read. Because the negativity a blogger writes about can poison my own feelings, creating proverbial mountains out of molehills. I wondered why I was acting so volatile after certain familial phone calls, and I think that was a big part of it. (Let's be honest, though, it wasn't just the blog; I never enjoy forced conversation with Drama.)

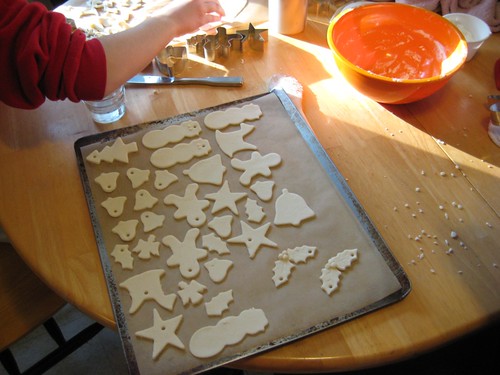
We also made a dent in preparing for Christmas. Remember how we thought our home here would be teeny tiny? (I'm too lazy to get a link here right now.) So we brought no Christmas stuff. No ornaments, no tree stand, no lights. Currently, we are in the process of deciding whether we'll go with white lights (Impera's choice) or colored lights (Trixie's preference). I allowed that this year, we can get that crappy tinsel which I absolutely hate and we have never had. We also baked three cookie sheets worth of salt dough ornaments:

We are thin thin thin - Not too heavy for a tree!

We turned on some Christmas music. (In my ideal world, Christmas would be centered on the two weeks before Christmas. Period. Six weeks of it just drains me. But, the Consort loves Christmas [I'd argue I do, too, just not in such large doses], so he gets to turn on the Christmas music the day after Thanskgiving.)

We played cards. Spades (because my goal as a parent is to train my girls to be our pinochle partners; they know this and refuse to learn pinochle, insisting we continue playing Spades instead), and poker (we split up the coins in our Change Tin for betting; next time, I want the girls to use their own money -- nothing better than a little bit of family cutthroat betting to make things interesting...).

Oh, yeah. I also made a pie. Yes! The weekend after Thanksgiving! Realize, please, that the photo I shared on Thanksgiving was the extended family pie table. We only made two of those (upside down pear cake and cranberry tart), and they were both mostly eaten on Thanksgiving with the others. I still had one pie's worth of vodka dough. Wait, I never blogged about the failure which was vodka dough, did I? Here's the scoop: Adding vodka to pastry dough is the new Thing to do. Because vodka evaporates completely when baked (I ask, water doesn't?), it results in a fabulously flaky crust. Maybe. But the fact that vodka never freezes means the dough remains soft and sticky, so the beautiful crust edge you create just flumpfs in the oven, and you stand there, looking through the oven window, begging and pleading with Fate that the dough won't flumpf so much that the filling will ooze out and create a baked-on mess in the oven. Sure, the dough may be flaky (not significantly more so, in my opinion), but the ulcer you get during the baking process makes it anti-worthwhile.

One recipe made enough pastry for two pies, so I still had one disc of dough in the fridge. I had made a squash and sage risotto on Saturday, thus the knowledge that we had arborio rice in the pantry was fresh in my mind.

I took the vodka dough, some arborio rice, some milk, and some spices (plus eggs etc.), and made a Tarte Au Riz (Rice pudding pie, pretty much). This is a Belgian staple (actually, it's usually made with a yeasted tart dough, but what the hell), and I would really like to be able to make one like you get from the bakery in Belgium. I allow myself one try a year (so much creaminess, it's dangerous, otherwise). Mine are good, but not what I remember.

Tasty goodness, even without nutmeg.

Now, I need to find my motivation and finish a project. Anybody see it anywhere?

17 November 2007

Fridge Clean-out Lunch

In preparation for the Thanksgiving influx of food, I emptied out the fridge today. (Notice I didn't say "clean out." No washing was involved in my actions.)

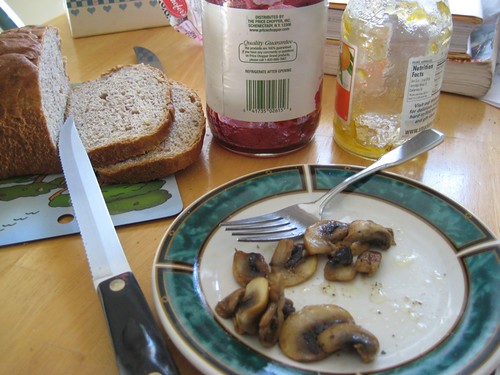
We're pretty good about eating things up before they go bad, but certain things were taking up more room than they deserved: Two practically empty jars of jam, a jar of garlic olives with only two olives in it, and two mushrooms. I had a hankering for mushrooms sauteed in butter, so for lunch I sliced and sauteed the two mushrooms, ate the remaining olives while the mushrooms were browning, and had two slices of homemade bread with the leftover jam.

Yum. My lunch certainly hit the spot.

We are tasty, eat us up!

19 October 2007

Food and Blogging (but not food blog)

Earlier this week, Mizmell shared her solutions to feeding unexpected guests. I promised I’d share one of our quick recipes, too. As you can see from the photo, the Consort thinks this particular recipe is perfect for those last-minute guesses ;-)


Note the splatters on the page. We are messy cooks.

What’s great about this recipe is that you probably already have all these ingredients in your cupboard (because everybody keeps pine nuts on hand, right?). I would have made some this week, just so I could take pictures for this post, except we had it when our Boston friends were visiting a few weeks ago, and we had pasta twice already this week (once with the last of the season’s basil – the girls made pesto; and once with vodka sauce—jarred, but all-natural and oh, so good) and I wasn’t sure that the Consort would be happy with pasta three times in one week (he’s all about ‘variety’ and crap like that, the crazy guy).

Here you go: Tomato Pesto Pasta Sauce, from Quick Vegetarian Pleasures

1/3 cup pine nuts, lightly toasted
6-oz. can tomato paste
1/2 cup minced fresh parsley
2 teaspoons dried basil
1/2 cup olive oil
1/2 cup grated parmesan or Romano cheese
2 garlic cloves, minced
1/2 teaspoon salt
freshly ground pepper to taste

Combine all the ingredients in a bowl. You’re done. Ta-daaaaa! Now go socialize with your last-minutes guests.

Actually, I often mix in 2-3 tablespoons of the pasta water to the sauce to thin it a bit. And don’t forget this sauce goes on top of one pound of pasta, so you’ll have to cook that up, too. The cookbook says capellini, but we’ve made this on everything from thin spaghetti to penne, and it always tastes great.

Oh, and lest I forget: MizMell also urged me to join National Blog Posting Month (or, NaBloPoMo). I figured, since I failed so miserably at NaNoWriMo last year, that I probably should have started smaller, and posting on my blog daily (including weekends!) probably has a better chance of success than writing 50,000 words of a novel (Note: you’re just promising to post daily, not lengthily). If anyone else would like to join, let me know and I can send you an invite (you can do it yourself, but this way you’d be automatically added to my friends list, which currently numbers one friend: MizMell). This would be a wonderful way for people who have not blogged in a year (or two) to get back into it. *hint, hint*

28 September 2007

Recipe Exchange

This morning, someone* invited me to join an online recipe exchange. I was to email a favorite quick recipe to name #1, move up name #2 to line #1, add my name to line #2 and mail this request out to 20 of my closest friends. I had to decline, for four reasons. First—twenty friends? I don’t think I’ve ever had that many friends at any one time (perhaps, ever in my life?—nah, let’s not go there, I don’t want to get depressed on a Friday!**). Second, I had a pretty good idea who two other people were on this person’s mailing list, so I’d have to delete them from my list, which would make my friends list even shorter (and more depression-inducing). Third, doesn’t this smack of a Ponzi scheme to you? Maybe we should ask our friend Norman. Or, maybe we shouldn’t (remember, it’s Friday). Fourth, although the sender wisely sent this email out to the internationally known “undisclosed recipients” list, did I really want my email address everywhere and in everybody’s mail program, to be sucked up when a naïve Internet Explorer person got their mail hijacked by a nasty ’bot?***

But just because I didn’t participate in the email exchange, doesn’t mean I can’t share a recipe. So, here is my quick recipe offering.


Fresh Tomato and Corn Soup

Note: This is only worth making when the tomatoes and corn are vine-ripe and local (from your garden or local farmer’s market). DO NOT make this with crappy vegs. You'll just end up with crappy soup.

2 Tablespoons butter
2 large onions
4 garlic cloves
1-2 ribs celery
1-2 carrots


1. Chop the vegetables, melt the butter, saute them all together until they begin to get brown (10 mins.)

2. While Step 1 is going on, core and cut up:

3 lbs. (5 very large or the equivalent) tomatoes

3. Add to the pot:

those tomatoes
4 cups vegetable broth
1/2 teaspoon sugar
1 teaspoon salt
Generous grinding of fresh pepper


4. Bring to a boil, reduce heat to a burbling simmer and cook 20 minutes.

5. Take pot off the heat, process with a hand-held blender or in a food processor (really, just go out and buy a hand blender. They’re $20 and make your soup-making life so much easier).

6. Return to the pot, and stir in:

1/2 cup parsley, chopped
the kernels from 2 ears of corn


Enjoy!

NOTES: The heat of the soup will “un-raw-ify” the corn without overcooking it. It'll still be crunchy when you eat the soup. I love this soup, and if you wish you could make gazpacho with your garden tomatoes, but really don’t like the bitterness of raw garlic and onion, this is a good compromise. The cooking sweetens the onions and garlic, and makes this soup a more palatable choice for non-gazpacho-loving humans. If you have time, make it early and let it cool. That’s good, too.

_________

Now, if you’re feeling a bit depressed that I don’t have more friends, you can go cheer yourself up by watching this YouTube video.****


*Who shall remain Nameless. I don’t want a black eye!*****

**No, no—the correct reply is, “Oh, Imperatrix, it’s just that you go for quality, not quantity!” [pat, pat, pat]

***It’s inevitable. It’s Microsoftworst.

****My sister Cowgirl shared it with her email list yesterday, and I thought it was very funny. I’m not really swiping her find, because 24 hours have passed, so it’s now in the public domain. Also, since she isn’t visiting lately, I bet she won’t even know I’ve used it. Hah. Take that, you non-blog-visiting sibling! (Oh, but she’s not the one who sent the Ponzi scam.) (Not that I’m implying it was Three of Four who sent it, either. Nope.) (It was that Other One. The Nameless One.)

*****Yes, you did! You gave me a black eye! I don’t care that you say it was an accident. Three-year-olds do not “accidentally” punch their peaceful 5-year-old sister in the eye (even if by “punch” I may mean “run one’s head into”).